Applications support a wide variety of use cases to accomodate almost any market or event.
To create Applications
First go to your Applications in your lefthand toolbar.
From there you can create any number of Application templates. An Application template is an Application that is not directly linked to an Event or Event Season.
To create a new template click on the +Add application template button at the top right.

Start creating your Application template
Below, we walk you through all the major sections.
Application Name

Example:

Application Point of Contact

Application Message
The Application Message is your opportunity to communicate any information not covered in other Application sections.

Generally this includes things like:
- a welcome message
- instructions on how to apply
- communicating your fee structure
- any other housekeeping information
Vendor Types
Vendor and Exhibitor Types allow you to preselect the types of vendors or exhibitors you allow to apply to your application. Any that are not selected will be unable to apply. If a vendor/exhibitor selects your application, they will get a message that the event is currently not accepting vendor or exhibitors of that type.

Vendor / Exhibitor Categories
Categories allow you to preselect the type of vendor or exhitiors you allow to apply to your applicaiton based on the category type. Any vendor or exhibitor categories that are not selected will be unable to apply. If your application is selected they will get a message that the event is currently not accepting vendor or exhibitors of their category.

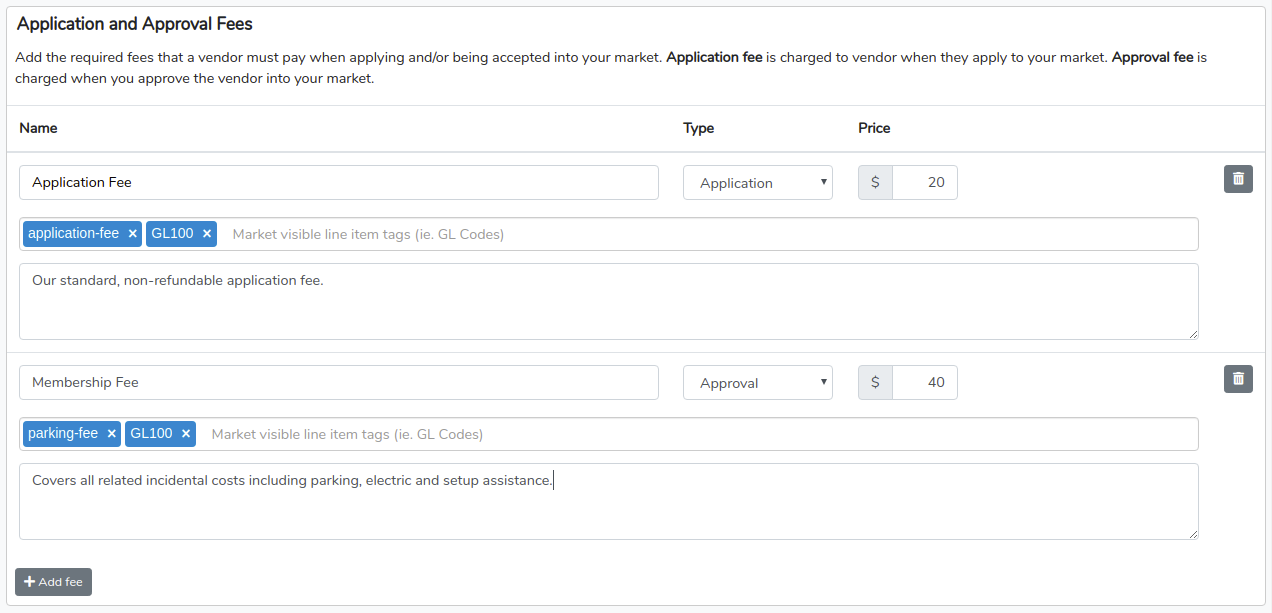
Application and Approval Fees
Applications can include two types of automatic invoicing:
- Application Fees
An application fee automatically creates an invoice when someone submits the application. You can create as many application fees as you would like. If Credit Card payments are enabled, they will be charged the fee when they submit the application. If they pay via cash or check the invoice will get created for you to reconcile when the payment is collected.
- Approval Fees
An Approval fee automatically creates an invoice when you approve an application. You can create as many Approval fees as you would like. If you have Approval fees defined for an application, when you approve that application you will be presented with a list of available approval fees for which you can then select which to apply to that vendor.
To add a new Application of Approval Fee click the gray + Add Fee button.

Below is an example of what an Application Fee and Approval Fee could look like.
For more information on using Application and Approval fees, review our Configuring Vendor Fees Guide.
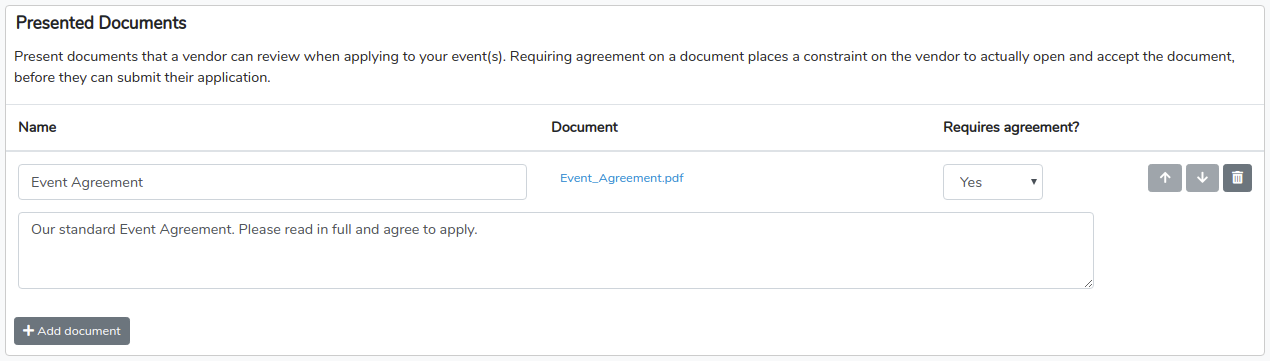
Presented Documents
Presented Documents are documents that you would like to post in your application for vendors and exhibitors to read. You can force document acceptance by selecting "Yes" under Required agreement. Applications can have as multiple Presented Documents.
To add a new document click the gray + Add document button.

Below is an example of a required Presented Document.
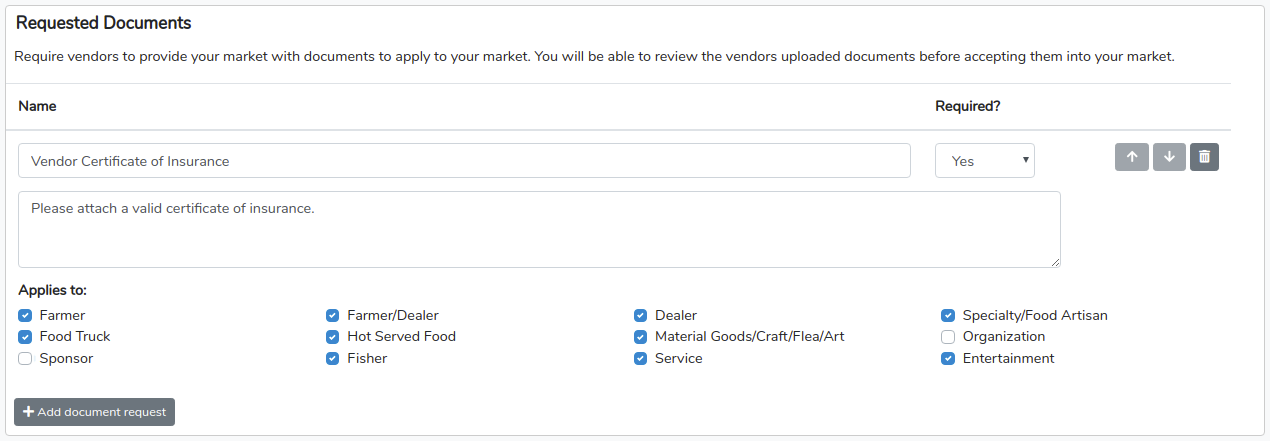
Requested Documents
Requested Documents are documents that you would like the applicant to attach to their submission. These can be Required by selecting "Yes" under Required?. You can also control which vendor and exhibitor types it applies to. Any type not selected will not see this requirement.
To add a new Requested Document click the gray + Add document request button.

Below is an example of a requested document.
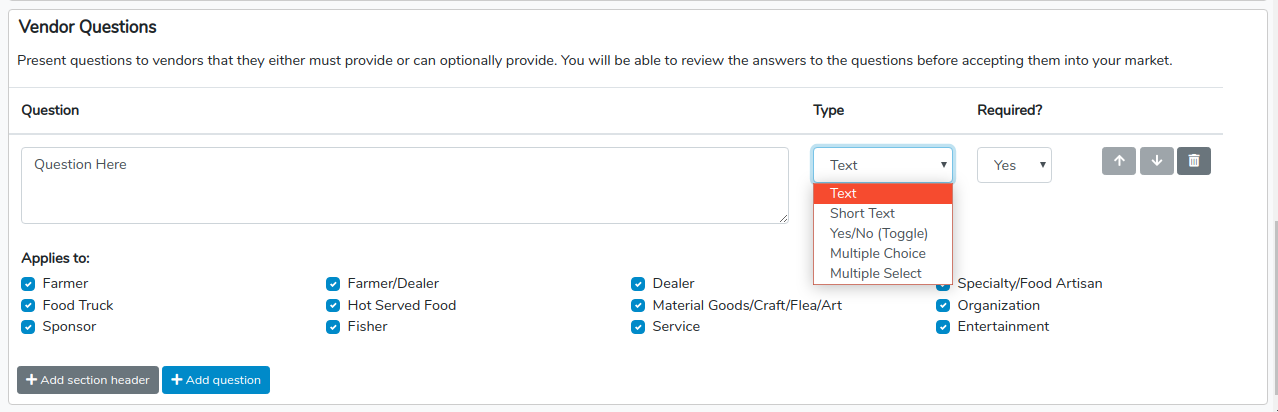
Questions
The Questions section allows you to create as many section headers and application questions as you would like. Supported questions types are:
- Text question: A question with a large text answer box.
- Short Text: A question with a short text answer box.
- Yes/No (Toggle): A question with a yes/not answer toggle.
- Multiple Choice: A question with a defined list of choices where only one answer can be selected.
- Multiple Select: A question with a defined list of choices where multple answers can be selected.
To help organize your questions you can create section headers. To create a section header click on the +Add section header button.

Then, type in the section name and select which types should see the header. Below is an example header we called "Business Questions"

To add an application questions, click on the blue +Add question button.

Then, type your question in the Question box, select the question type and whether it is required or not. After that, select which types of applicants should see the question under Applies to.
When you're done creating your application click the blue Save Application button at the bottom right.

From here please refer to our support document on Linking and Managing Active Applications.