Welcome to Messenger, the easiest way to bulk message your contacts!
Messenger was designed to be very intituive, as you can see for yourself below.
Finding your way around
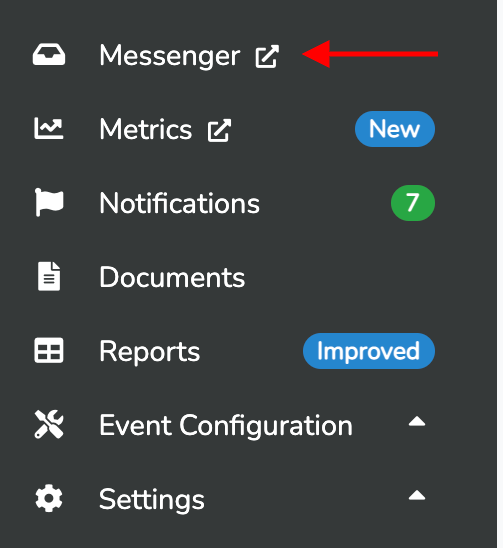
To start, click on Messenger tab on the left-hand menu
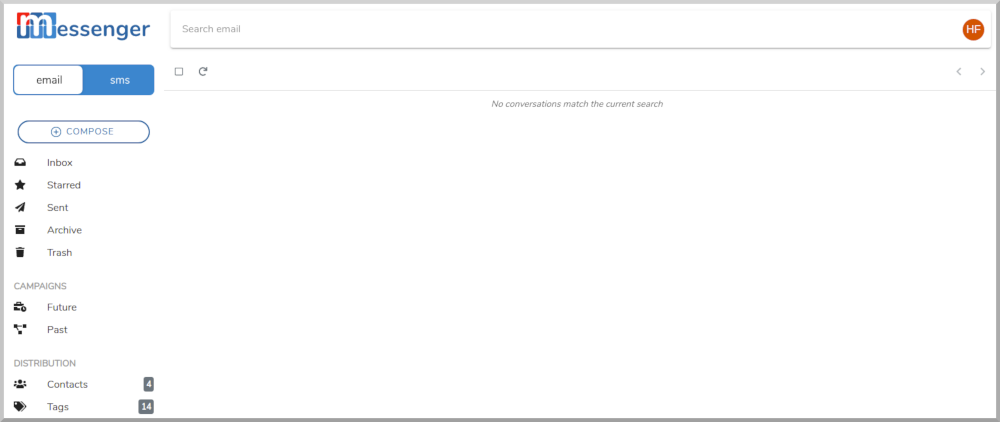
To verify which account you are logged in as, look for the account icon at the top right. In this example, we are logged in as the Hollins Farmers Market, symbolized by "HF".

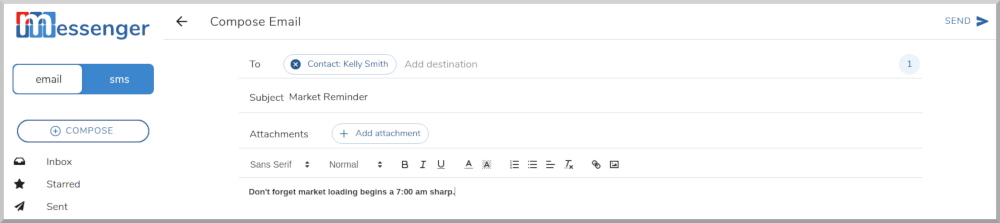
As Messenger supports both Email and SMS Texting in the same interface, make sure you get familar with the message type toggle. The white highlight denotes the currently selected message type. In the example below, email is selected. The selected message type will automatically update your message folders view for that type. For instance, if you have email selected and go to your inbox or sent folders, it will only show received and sent emails. Conversely, if you have SMS selected it will only show received and sent SMS text messages.

Just as you would expect with other modern email clients, Messenger makes available default message folders for:
- Inbox where all your new messages are stored by defualt
- Starred a folder where any "starred" messages are listed
- Sent where all your sent messages are stored by default
- Archive where all your archived emails are stored
- Trash where any deleted messages are stored before final deletion
See the screenshot below for the list of folders as you would see them in the Messenger application.

The Future and Past links under CAMPAIGNS are for scheduling and montioring message campaigns that are preconfigured to be sent on a specific future day and time.

And your contacts are listed under Contacts in the DISTRIBUTION section.

Creating Contacts
To create a contact click the Contacts link at the bottom left, under your message folders.

Then click the + ADD CONTACT button

This will open the add contact form as seen below. For each contact you can enter multiple email address and phone numbers.

According to regulation, all contacts for mass marketing distribution need to be marked as Subscribed in order to send them messages. Any contact autocreated via our embedded signup widget or via a direct signup message (ie. via our flyer QR code) automatically gets the subscibed status. Any manually created contact needs to be marked as subscribed. Note: You may only mark manual contacts as subscribed if you have their express permission to receive marketing material. You can subscibe a contact by toggling the subscribed status indicator in the create contact form.

Adding New Tags to Contacts
Notice that under the Contact Name field you can add Tags. By default any new contact - not a vendor contact automatically created by Farmspread or Marketspread - has a default "customer" tag. You can add as many additional tags as you would like. In this example, we want to add a "VIP" tag as well. Just simply type the new tag on the Tags line and hit enter. Adding a custom tag can really help you refine your Distribution lists.

After filling out the contact click the SAVE button at the top right.

You will now see the new contact listed under your contacts list. Notice that the second column shows that this contact has both an Email and SMS number associated with it. In the third column, you will find a list of tags assigned to this contact. Then to the far right are options to edit and delete the contact.

Sending a simple Email message
To send a simple email message, make sure you have EMAIL selected (highlighted in white) under the Messenger logo then click the (+) COMPOSE button at the top left.

This will open the email form as seen below.

IMPORTANT! The first thing to note is the ADVERTISEMENT vs. TRANSACTIONAL toggle. Please select the correct type of messenge to send. It is very important to understand the difference between these two types of messages.
Transactional message are ones that is sent based on a pre-existing business relationship or the expectation that you will be sending someone an email. These are usually sent to transact some part of your business or an existing relationship. While Messenger will allow you to send these types of messages to unsubscribed contacts be very careful that the messages are truely transactional in nature.
Advertisement messages are ones that are sent to advertise something or are generally unsolicited. These messages can legally only be sent to subscribed contacts. Messenger will not allow you to send these types of messages to unsubscribed contacts.
Since Messenger is a bulk / campaign style message tool you need to select your destinations from pre-configured contacts or tags.
A Contact is always a single person that can have one or more email addresses or SMS numbers.
A Tag is an identifier that is used to automatically group multiple contacts.
Either a Contact or Tag or both can be used in the To destination field.
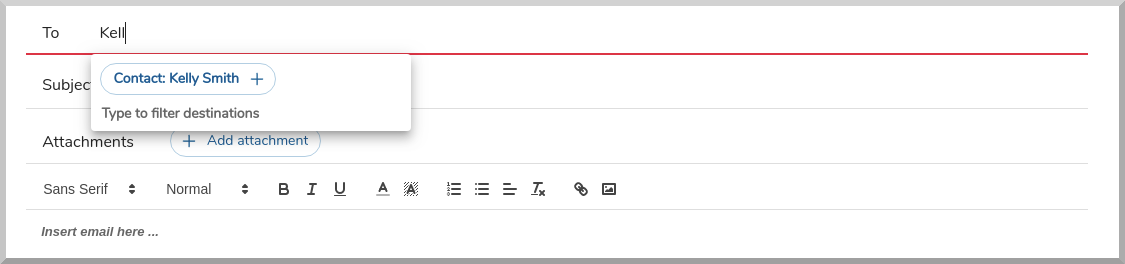
Simply start typing the name of a tag or contact and it will give you autocomplete options. In the example below I want to send an email to David Smith so I start typing "David" to get the contact to autocoplete. Simply click the contact to add it to the list. You can add as many contact destinations to the To line as you would like.
After clicking the autocomplete tag, you will see it listed similarly to the example below. Note that the (1) listed to the far right is a count of the acutal number of recipents. Contact destination tags can represent 1 or more actual contacts so this indicator is helpful in determining the number of actual reciptents.

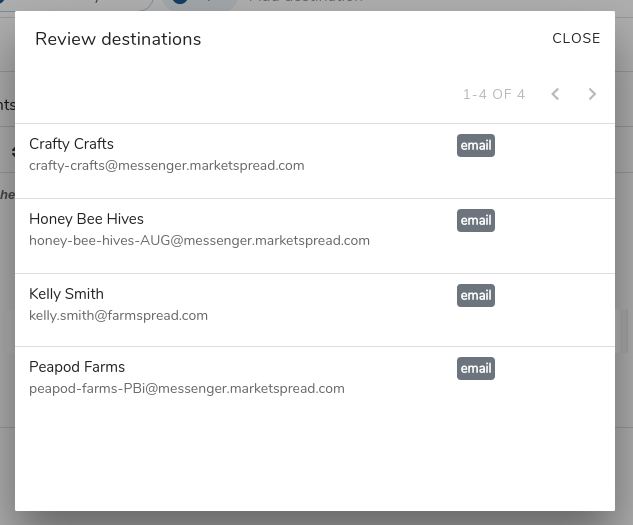
To see the full list of contacts just click on the contact count indicator. This will open a window detailing exactly who the message is going to. Remember this is important as a destination tag is usually made up of mulitple contacts. For example, if we add the destination tag for all vendors in the Hollins Farmers Market you will see the indicator jump by more than 1.

Clicking on the count indicator, you can see that these two tags actually make up a list of 4 recipients in total (see below)
Understanding how to add Tags as a destination
The use of Messenger Tags to quickly create messages for large targeted groups is a powerful feature. Adding Tags is an intutive journey that is made up of stages as explained below.
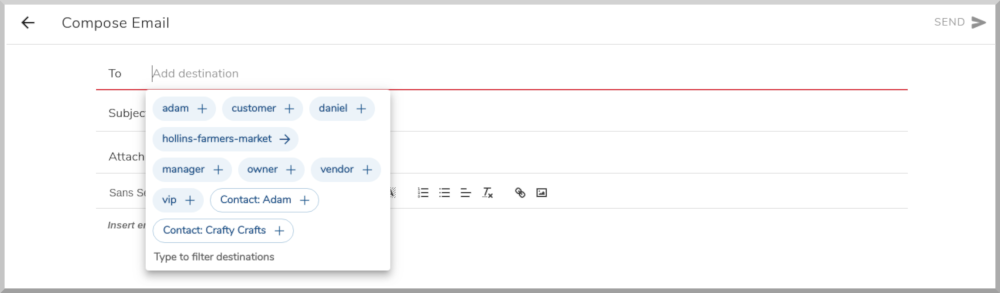
Click in the To field of a new message. You will see a bunch of available tags, some with a + sign at the end and some with an -> at the end. The ones ending in plus signs + indicate they are a final destination tag. The ones ending in the arrow -> indicate more selections are available under that tag.
For instance, if I choose hollins-farmers-marker from above I am automatically given options for all + (indicating all contacts within the top level market) along with a list of event tags, in this case summer-season-2020 ->.

If I then select summer-season-2020 -> it will show me another layer of options starting again with all + representing all contact in the hollins market - 2020 summer season. I can continue to drill down by-type, by-category and by-status.

Selecting by-status, for example, will once again give me options starting with all + which represents contacts across all statuses. Additoinally, I can choose one of the available status types. Notice that the status types (ie. applied + and received +) both end in a plus sign +. Remember, in the tag selection journey anything ending with a plus sign + means it is a final destination.

By selecting that applied + tag my selection is complete and the message will include all vendors in the hollins farmers market - summer season 2020 - by-status - applied. Since some of these tags are lengthy they are front truncated by default. To allow seeing the complete tag just hover over the tag.

Now that we understand how to add recipients, lets draft an email to send.
Then, to send the message click the blue send icon at either the top or bottom right.

To check on the message, click on the Sent folder on the left. Just like a normal email client you will see the message you just sent.

To see what the message looks like to the contact it was sent to lets log into Gmail and take a look below.


Sending a simple SMS Text message
To send a simple SMS Text message, make sure you have SMS selected (highlighted in white) under the Messenger logo then click the (+) COMPOSE button at the top left.

Since Messenger is a bulk campaign style message tool you need to select your destinations from pre-configured contacts or tags.
A Contact is always a single person that can have one or more email addresses or SMS numbers.
A Tag is an identifier that is used to automatically group multiple contacts.
Either a Contact or Tag or both can be used in the To destination field.
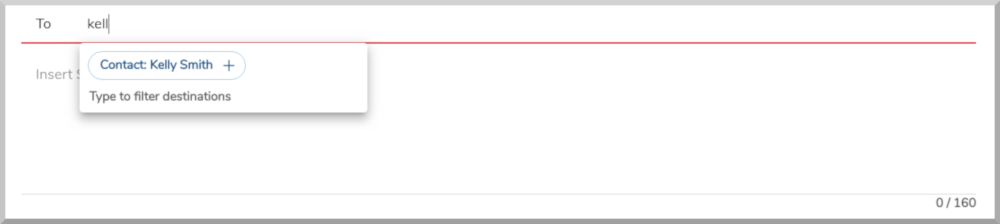
Simply start typing the tag name and it will give you autocomplete options. In the example below, I want to send an SMS Text to David Smith so I start typing "David" to get the contact to autocomplete. Simply click the contact to add it to the list. You can add as many Contacts or Tags to the To line as you would like.
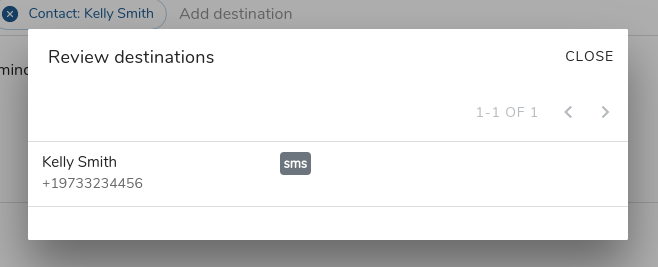
Since the To destination can have multiple SMS contacts associated with them you can verify the list by clicking the message count indicator highlighted below.
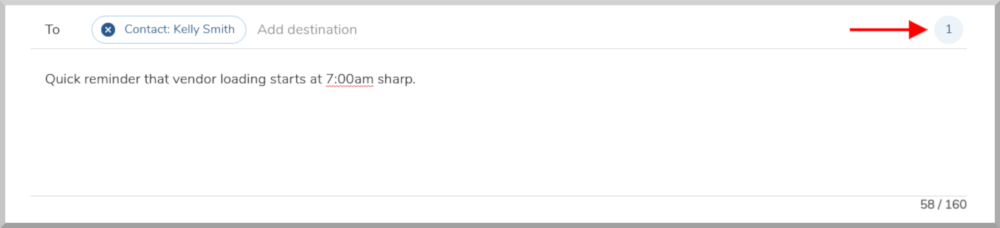
In this case you can see it is simply 1 contact.
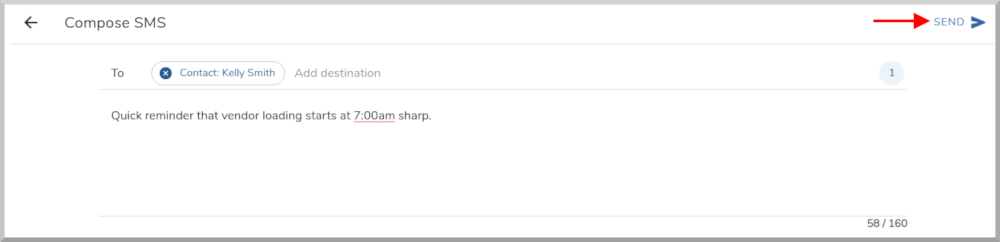
Also, since the SMS text protocol limits each message to 160 charactors we include a nice charactor count at the bottom right of the SMS Text Compose window.

Now, we are ready to send our SMS Text Message. Simply click Send icon at the top right as shown below.

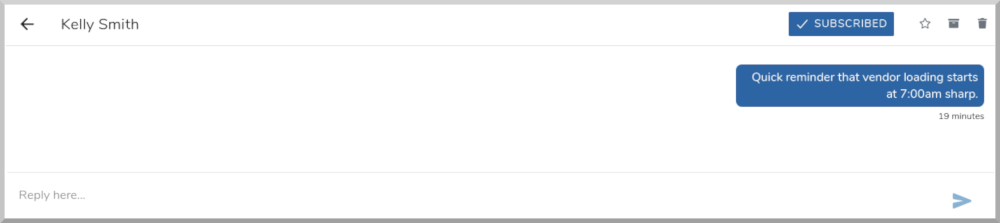
To see the sent message, go to your Sent folder.
Clicking on the message will open an interactive SMS text console that acts the same as if you were on your mobile device.
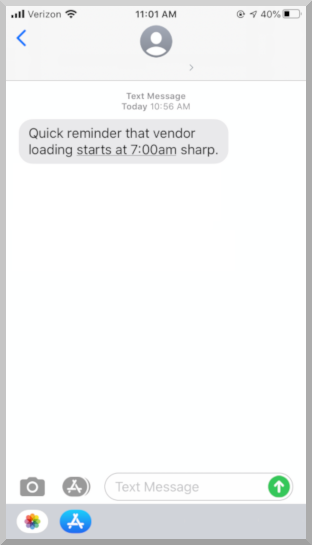
The SMS text as viewed on your contact's phone is below.
Sending a scheduled message (Campaign)
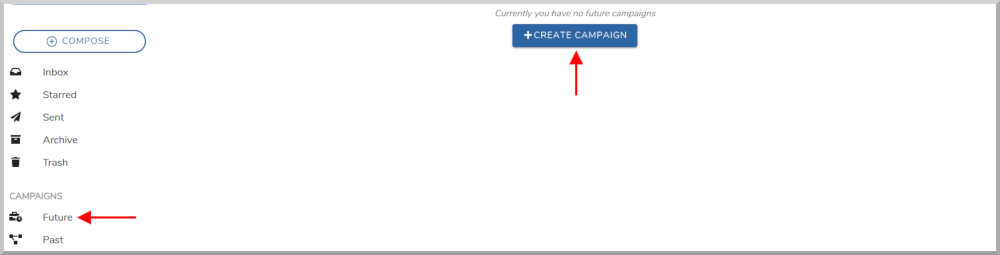
One of the advanced features of Messenger is the ability to schedule Email and SMS Text messages in advance. In Messenger these are called Campaigns. You can access them from the CAMPAIGNS section under your standard message folders to the left side of Messenger. As you can see there are two types of campaigns listed, Future and Past. These represent active campaigns scheduled for the future and old campaigns, sent in the past.

To create a new scheduled message "campaign" click on the Future folder to the left then click on the blue + Create Campaign button at the center top.
Here you will see the five sections that make up a new campaign: Name, Destinations, Email, SMS and Schedule.
First you will need to Name the campaign for tracking purposes. In this example we called it "July 4th Reminder".

Then, you need to do is set your Destinations. These are the contacts and tags that you want included in the message.

In the example below we added the Tag for hollins-farmers-market-accepted which will include all vendors accepted into our market.

After you name the campaign and set your destinations you will need to create your message, this could be either an Email or SMS Text Message.

In this example we are creating an SMS Text Message to send via the campaign.

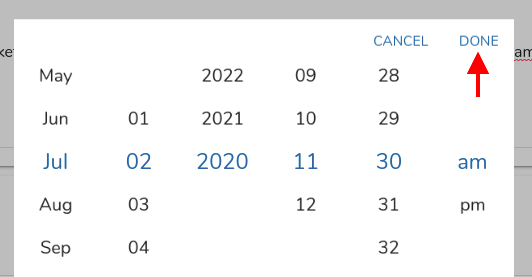
Finally, you will need to set a schedule but clicking the blue + ADD SCHEDULE button.

This will launch the day/time selector. Set the day and time you would like the campaign message set then click the blue DONE at the top right.
This will set the Send On as seen below.

When you are all set, click the blue Save button at the top right as seen below.

You can check on the status of all future campaigns by clicking on Future under CAMPAIGNS in the left-hand toolbar.

You can also check on all past campaigns by clicking on Past under CAMPAIGNS in the left-hand toolbar. In the example below you can see some test campaigns that were sent in the past.

Adding recipients by manually selecting contacts and tags
In addition to the using the Compose Tag selector you can also create messages directly from contact and tags.


Advanced Searching
coming-soon