In order to maintain a vendor wait-list, first log in to Farmspread, then click on the Dashboard icon at the top right. After that, select Vendors from the lefthand tool-bar.
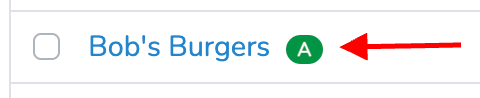
Go to any vendor with a new applicaiton that needs review, indicated in your list by the 'A' in a green oval
Scroll down and click "review" next to their appliation that needs review

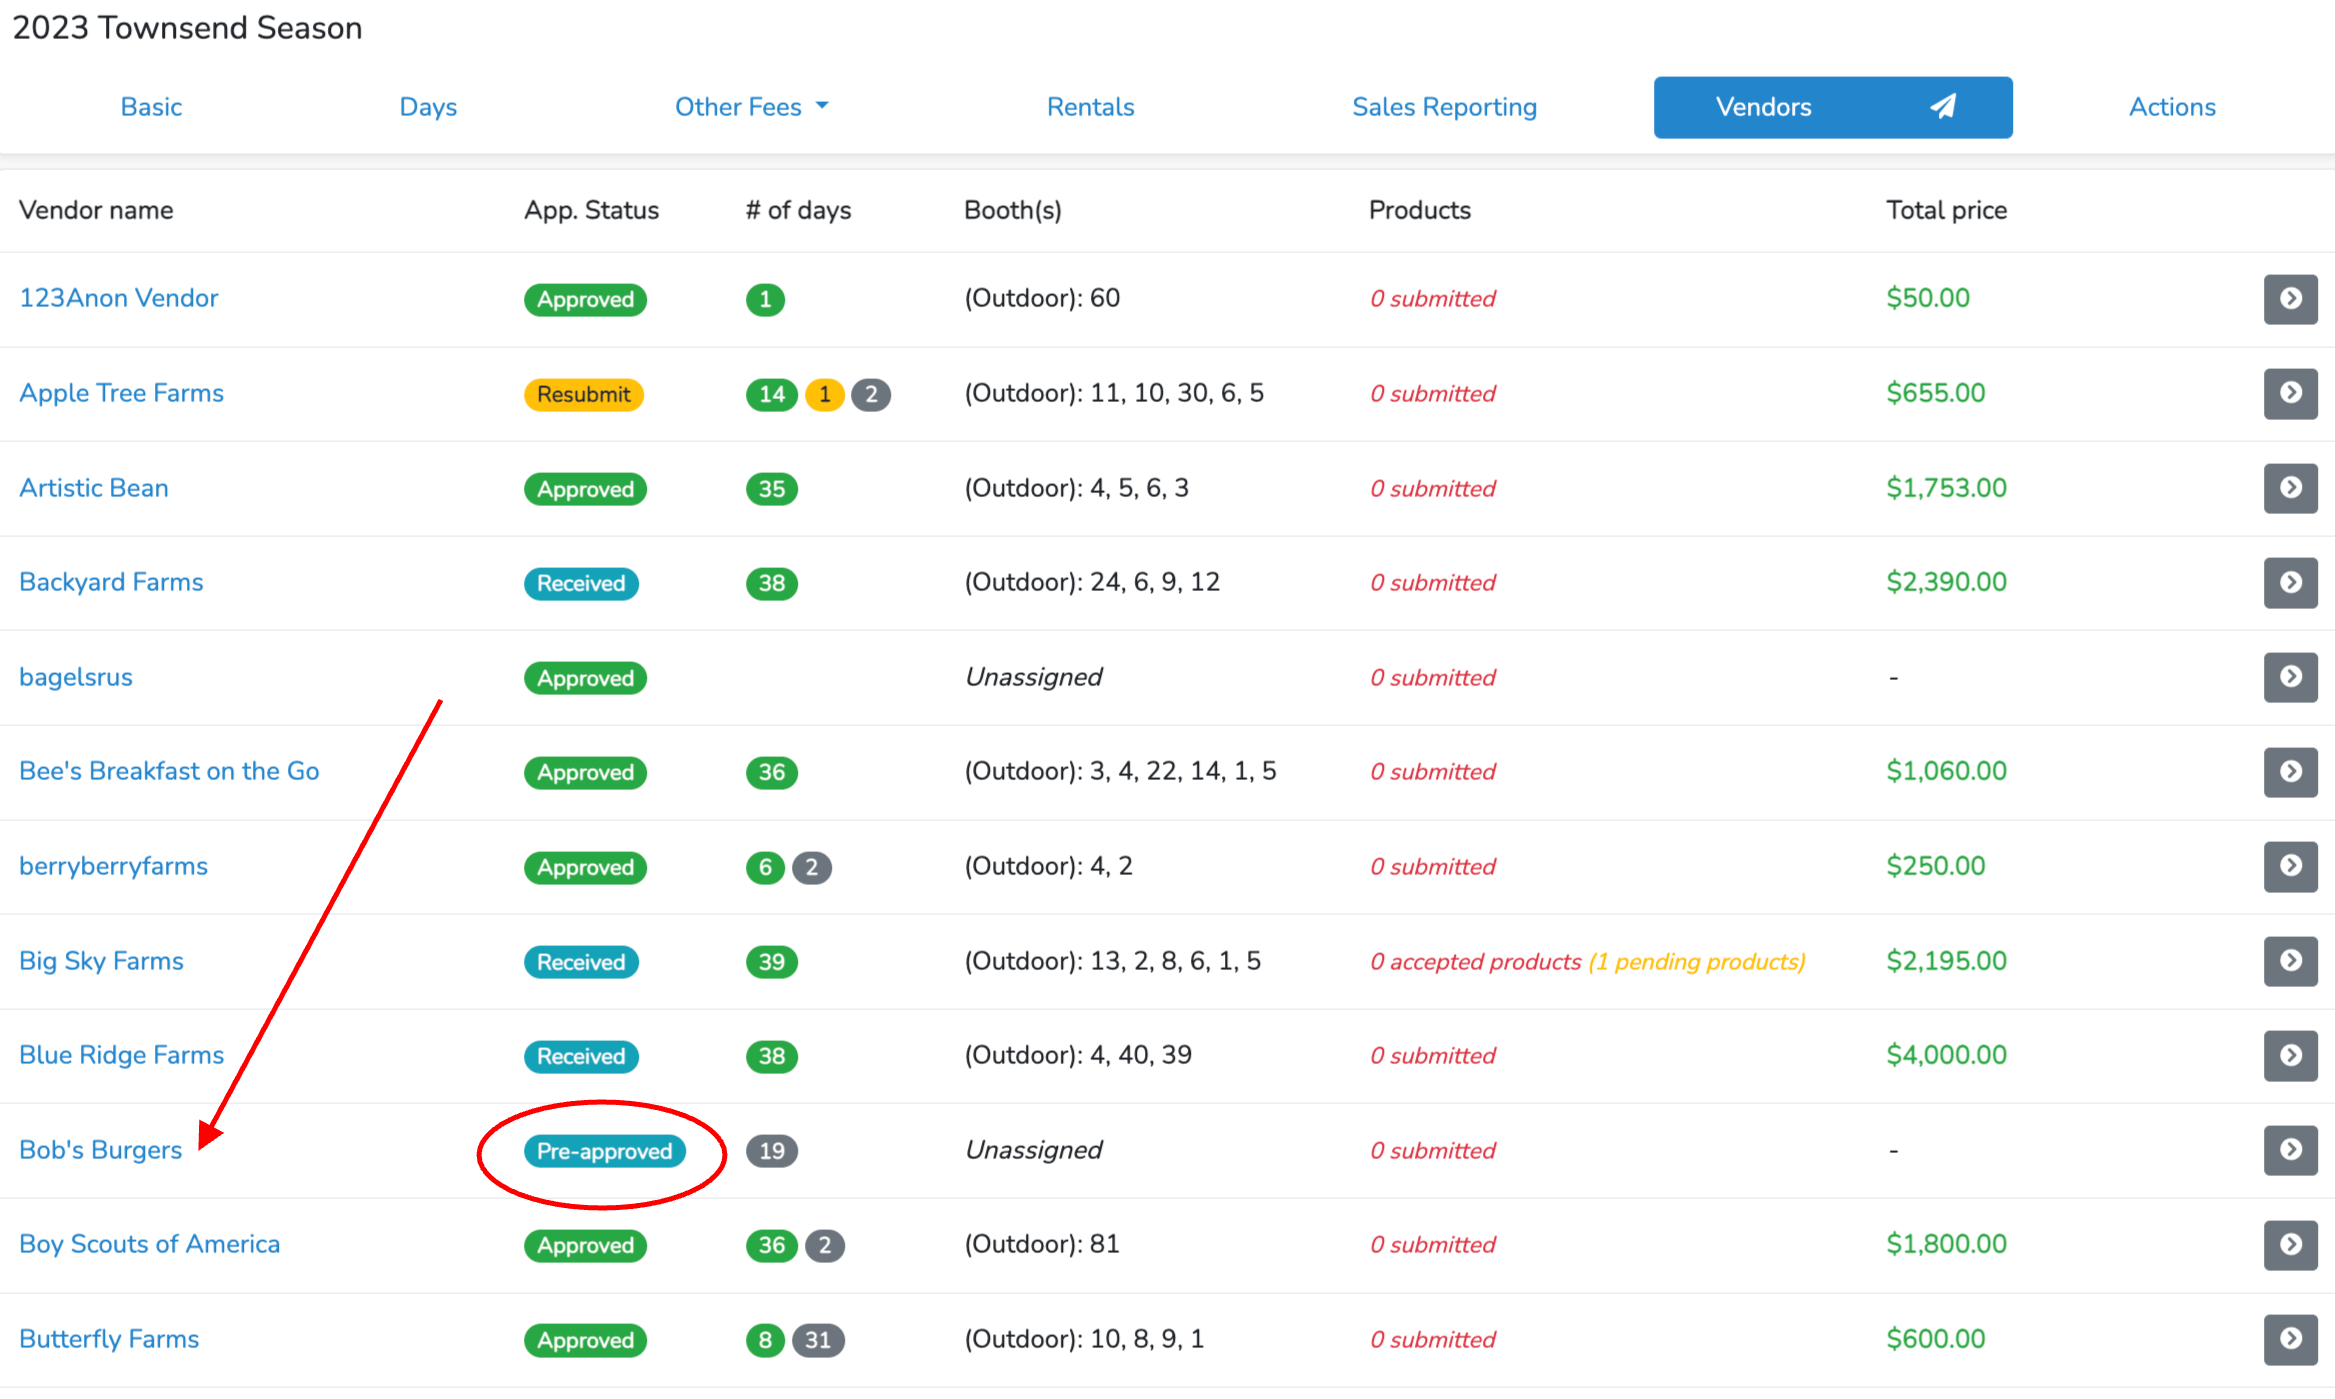
This will bring you to the vendor applicaiton section. At the top you will see some actions you can take including Decline, Resubmit, Withdraw, Recieved, Pre-Approve, and Approve.

Other articles can explain your other options in more depth, but the Pre-approve acts much like Accept but gives you as the market manager the option to let vendors know that their applicaiton has been approved, but you are not yet ready to schedule them for any event days. You can control the standard vendor notifications for each state by following the instructions in the following support article:
https://farmspread.com/support/article/25/
In your event view, in the vendors tab, you will see this vendor is listed as "Pre-Approved"
They will recieve a notification that they are pre-approved into the market, and will see their applicaiton status in their own vendor dashboard as well.
Then, additionally, you can adjust this vendors staus on a per event day basis if you want more detailed tracking.
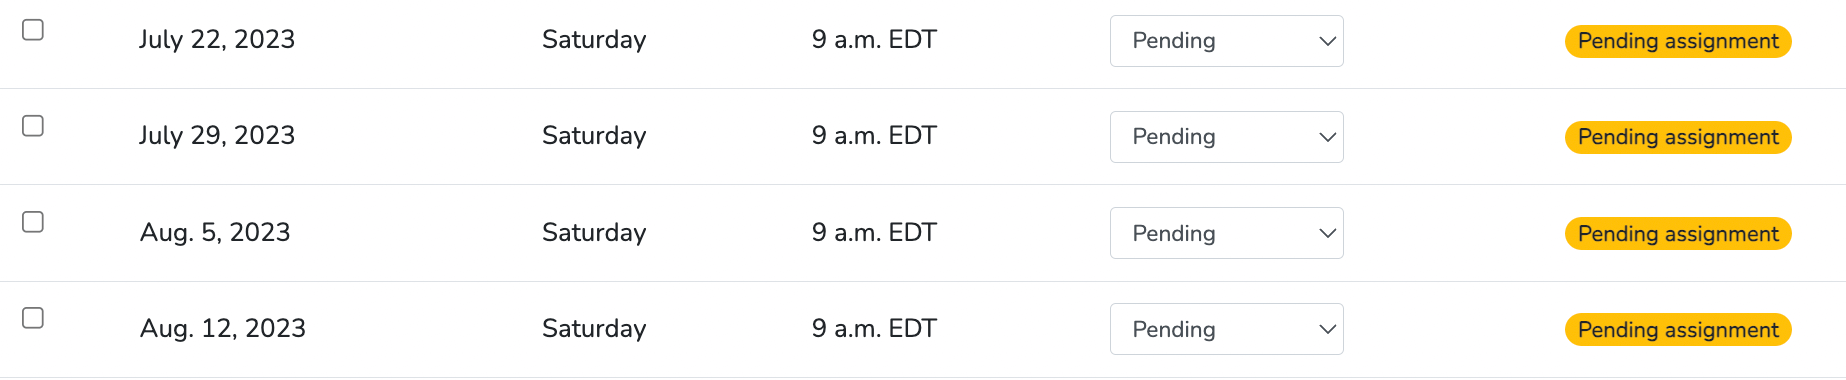
After pre-approval, the vendor's status per event day both on their application, and in scheduler will be listed as "Pending"
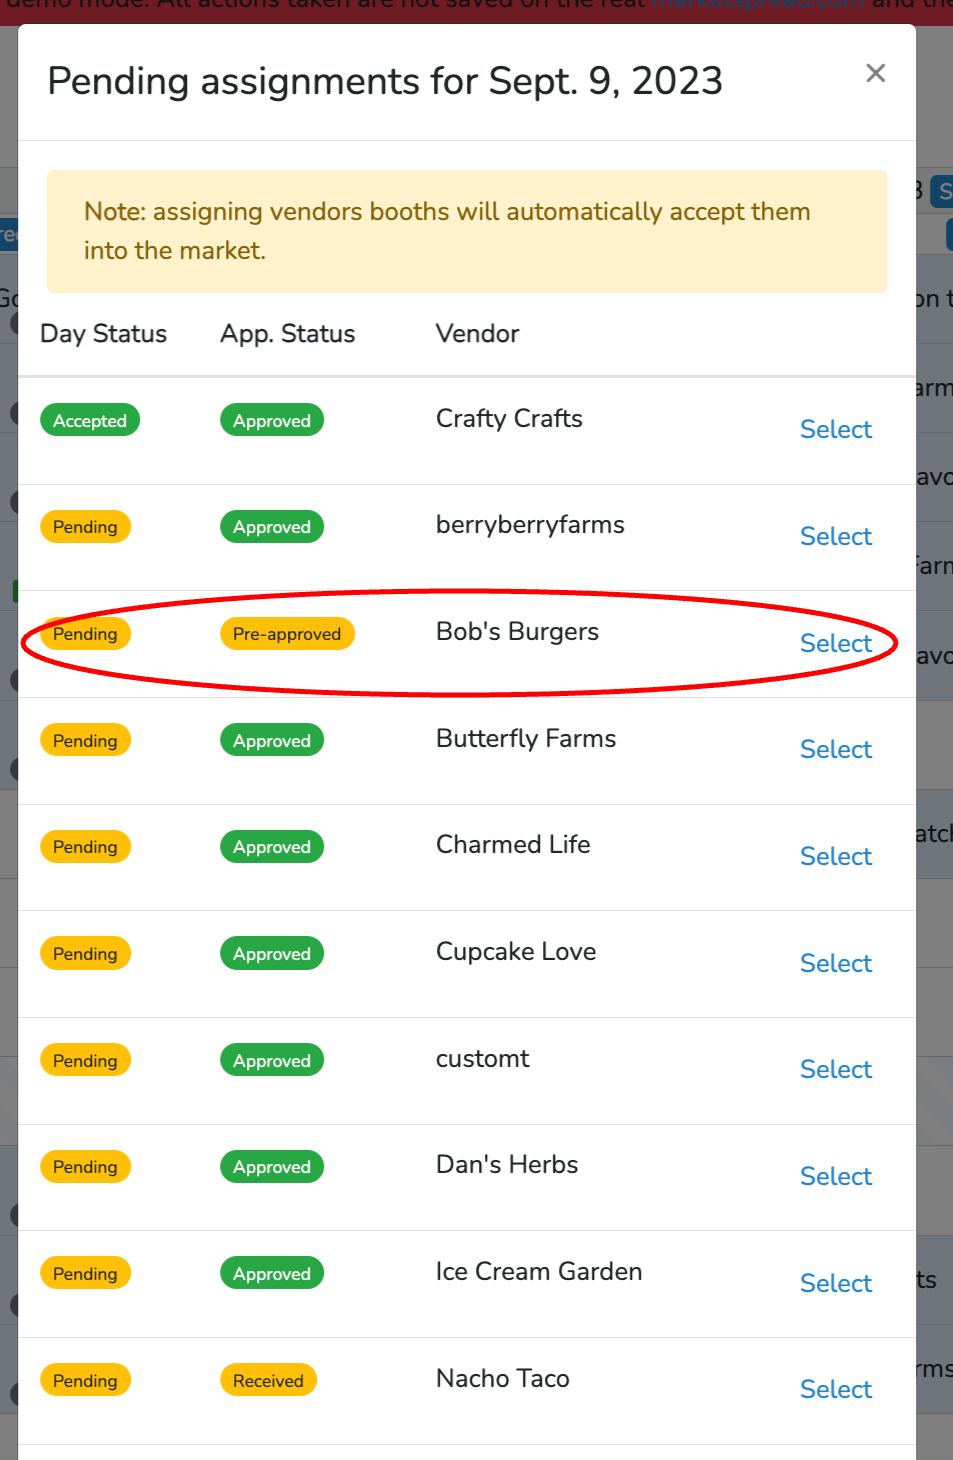
When a stall frees up and you want to assign a wait-listed vendor just open scheduler and make the assignment. This will automatically update their status from Pending to Accepted.
You can also go in to a vendor's applicaiton and adjust their wait-list status by day. To do this, navigate again to their vendor listing and click on the event applicaiton. Scroll down to the event days, and you can make adjustments here by event day.

These changes will then show up as this vendor's status in scheduler for you as you go to schedule vendors.
Unassigning the vendor from all stalls in the season will automatically switch them back to the Waitlist status.